 What would be your reaction when a friend tells you she’s going to build a popcorn machine dressed up as a steam-engine? Selling (organic) popcorn in a very entertaining and interactive way on large festivals, by acting, role playing and having big fun while earning some money. I thought it would be a great idea. A great idea that needed something special to come alive. Noises, background noises, random noises and interactive noises.
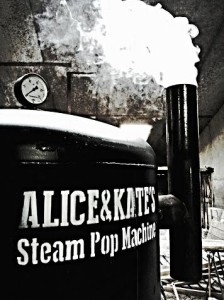
Alice & Kate, not there real names by the way, came up with this brilliant plan and build themselves a beautiful Steam Pop Machine all in Steampunk style. Checkout there website www.steampopmachine.com if you like to see more of this build, it’s in Dutch but the images will tell you what it’s all about.
They asked me “We like to add special noises to the machine, is that possible?”. Sure, no problem. So I hooked up an Arduino board with a MP3 shield and started programming.
It should make three sorts of noise:
- Continues background noice
- Random noises at random intervals
- Triggered noises
The continues background noise is the hissing noise you aspect to hear when a steam-engine is gently running, This might get boring after some time so the random, alarming and scary, squeaking and grinding noises at random time intervals will keep you awake. Then the triggered noises, they make the Steam Pop Machine more interactive. Like “The Large Emergency Button that should never be used”. Kids love these kind of “forbidden” features. When the emergency button is pressed the machine will come to a grinding halt, alarm lights start flashing and everything gets quiet. After some time the machine will, luckily, resume its normal function. Great interactive stuff!
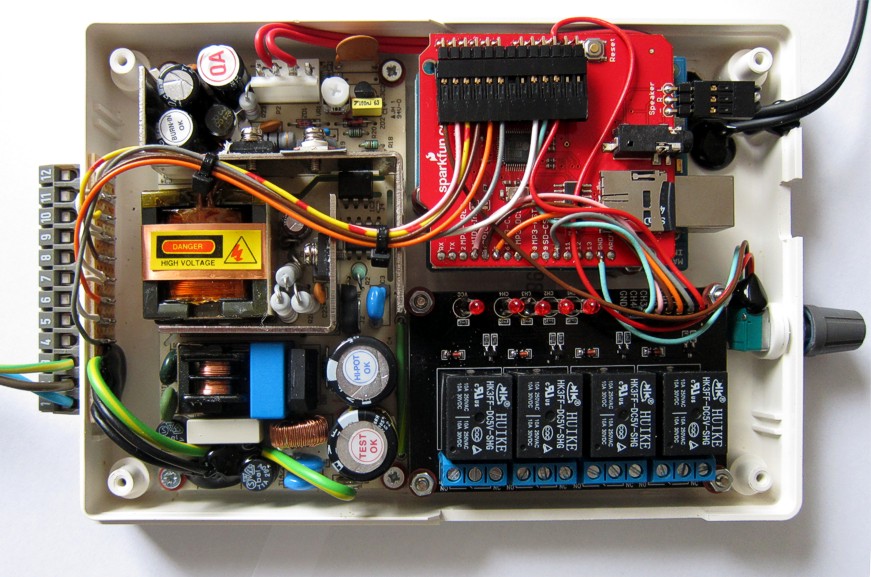
In the image above you see a 12V power supply on the left, the Arduino with the MP3 shield in the top right corner and a relay board at the bottom.
The screw terminals on the left are the inputs for the triggered noises (push buttons).
For controlling the lights I used a 4 channel relay board directly controlled by 4 Arduino I/O pins. The screw terminals are on the PCB so I made a nice slot opening in the side of the housing for the cables to get in.
More detailed information about the software can be found on my GitHub account github.com/bergrans/SPNM where SPNM stands for “Steam Pop Noise Machine”.
Thanks to Alice & Kate for this fun project!